For desktop development of low performance PCs that can’t run WPF forms smoothly, or just for simplicity, programmers opt for Windows Forms. But one can’t deny the coolness of WPF controls. How about an application that uses WPF controls in Windows Forms application? The advantage is performance of Windows Forms on low end PCs and WPF controls are shown when needed.
In this tutorial we will make a simple windows form application that uses the Data Grid control of WPF toolkit in a Windows Form application.
As Data Grid is not available by default in WPF so first Download the WFP tool kit from here. If you are using other controls of WPF then you don't need to download and Install this.
Start Visual Studio 2008 and create a new Project and in project templates, select the Windows Form application and name it whatever you like.
Add three DLLs of WPF as a references in your solution: select the path where you have installed WPF toolkit because WPF toolkit will not be available in the toolbar. If still you are not able to view the WPF toolkit option in the toolbox then rebuild your application and restart it.

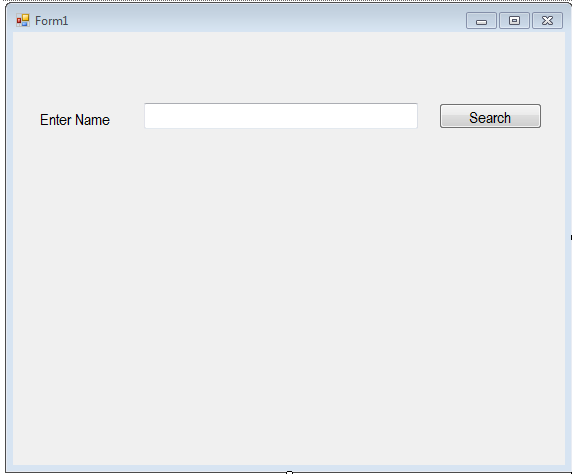
Now design a simple user interface as shown in the following screen shot:
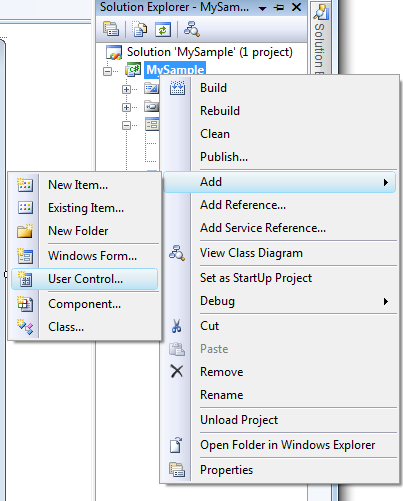
Now add User Control of WPF . For this, right click the solution explorer add new user control.
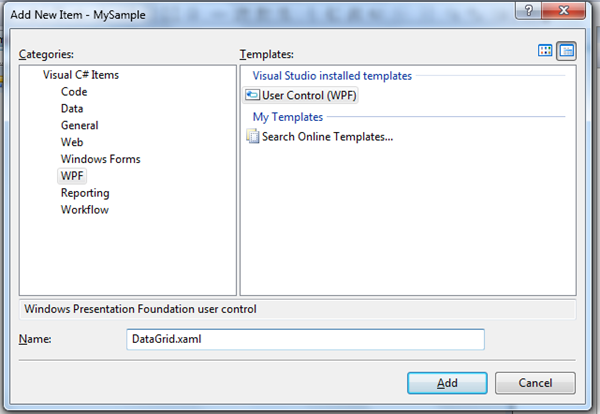
Add New Item window: now select WPF from categories and UserControl (WPF) from Templates. Name it DataGrid.xaml.
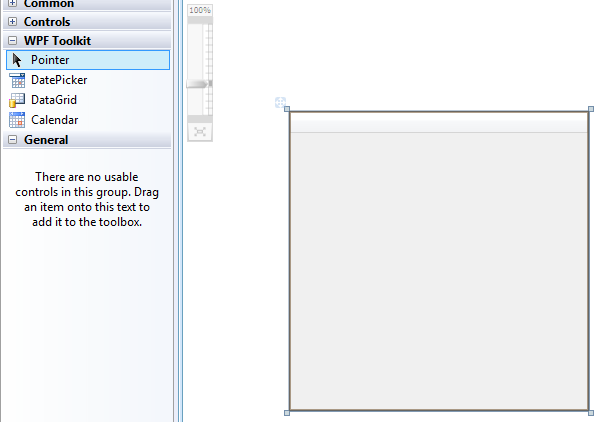
Now Select the user control from the solution explorer then you will see a blank window which will be similar to that when we are using WPF Form. Add a Data Grid from the Tool Box . Now we can add anything in our WPF user control.
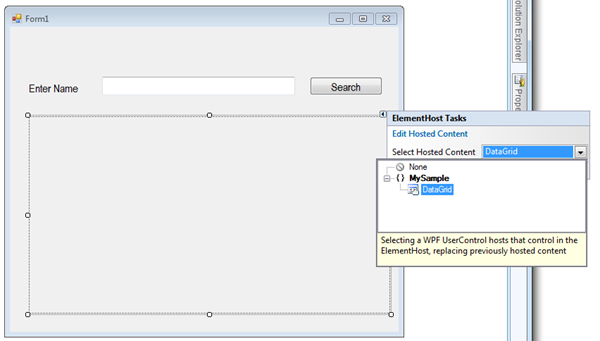
Now get back to the Windows Form Add this control to your form by selecting Element Host from your Toolbox. Drag the element host in Windows Form. Adjust its size then select its element hosted content.
After this, there is one more thing to remember that Data Grid in WPF will not accept the Data Set directly, we have to write a little code of XAML it the Data Grid. So go to the user control and select the Data Grid. Right click it and click View XAML and add this code
ItemsSource="{Binding}" .
So we are done with adding WPF control in Windows Forms easily…Now to make this windows form working, I have done some of my own improvements.
NOTE: Beyond this point, the DLL used in the tutorial is not included in the downloadable solution files… you can create your own, I have just used it for demo and screenshots.
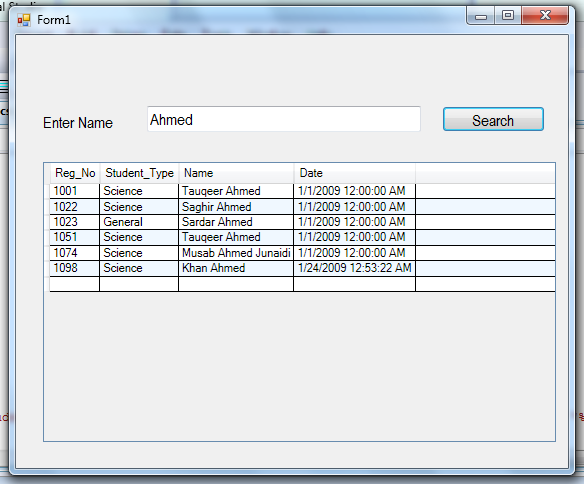
Now let’s work on the search button code , I have my DLL (which is not available for download in this tutorial) which has a class DataAccess which has methods related to database. I have used one of my methods in that DLL that accepts the query in parameter and it returns the dataset. That data set can be used to populate the data grid.
And here is the code be hide the search button.
        private void Search_Click(object sender, EventArgs e)
        {
            DataSet ds;
            ds = Project_Dll.DataAccess.SeeDataSet("SELECT Reg_No,Student_Type,Name,Date FROM Student WHERE Name LIKE '%" + textBox1.Text + "%'");
            dataGrid1.DataContext = null;
            //in the above line we can also do like UserControl.Item and what ever property we want to see
            dataGrid1.DataContext = ds.Tables[0];
        }
Download the Solution File: MySample.zip