iTunes is a must have utility on your Windows PC for iPhone users. If you are facing some troubles in installing iTunes on Windows 8.1, then this guide should be very useful for you. Let’s have a look at the procedure to download and install iTunes on Windows 8.1.

Download and Install iTunes on Windows 8.1
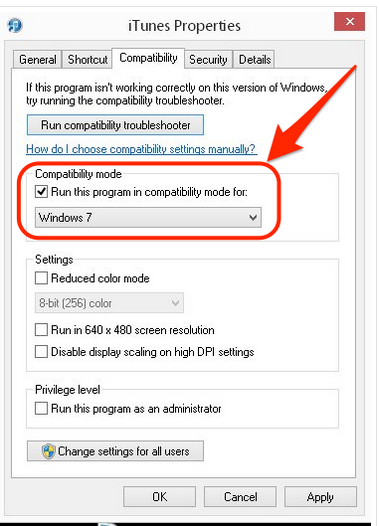
You can download the latest version of iTunes from official site of Apple. Right-click the web-installer file and open its Properties. You will see five tabs across the top. Go to “Compatibility” tab and hit the option of “Run this program in compatibility mode for”. Check the option of “Run as Windows 7” and “Run this program as an Administrator” and then click on “Apply”.
Go to the “Security” tab, and click on “Advanced”. Here, you will see one or two user types with label “Account Unknown” containing a long number string. These could create problems with installation. So, you must delete them. Click on one account, then click “Advanced”, and then “Disable Inheritance”. Now, click the button that pops up for “Convert Inherited Permissions to explicit permissions on this object”. After this step, you need to click on two unknown profiles and click “Remove” and then “Apply”.
Go to the last tab in the group that still lies in the Advanced Settings menu that carries the title “Effective Access”. Click on “Select a User” and then type the name you use to log into Windows 8 within the open box. Then, click on “Check Names”. You will see your complete user profile. Keep clicking “Ok” until you are out of the Properties menu.
Run Installation package of iTunes 11 and you should be able to do it without any worries now. This method should be fruitful to download and install iTunes on Windows 8.1.