Are you a web developer or a newbie in web who wants to experiment your newly created  website or a prototype and test it locally before spending some bucks on purchasing a webhosting? If yes then Internet Information Service (IIS) comes to the rescue. Just like Apache, IIS would host the website for you on your computer for free without any hassle which you can access from anywhere on the internet.
Here I would explain how to publish an ASP.NET website on the IIS web server which you can access on the local network, I would write on the internet part later.
Open your recently created ASP.NET website or create one, or if you want a quick tutorial on creating a Hello World website on ASP.NET then click here.
Step 1: First you have to publish your website, for that click on Build on the top menu and then click on Publish Web Site.

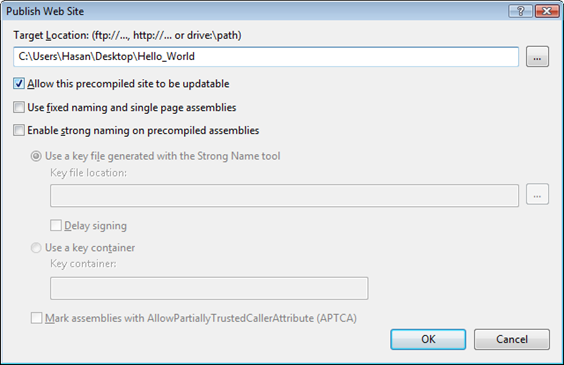
Step 2: Following window would open up, just click on the browse button adjacent to the address text box and set the location as given in the following screenshots.

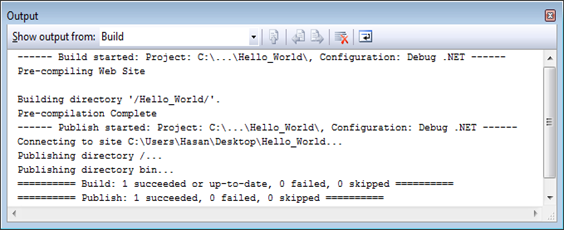
Step 3: If there are no errors in the code and publishing is successful then output box would show something like this.
Step 4: Now your website is published, you now need to setup a web server to host it, here we’d be using Microsoft’s Internet Information Service (IIS).
Assuming IIS is already installed on your computer (if not then refer to the 1st 3 instructions here)
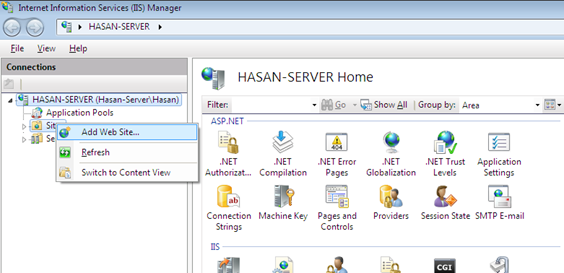
Step 5: Open IIS manager and on the left side-bar expand the tree and right-click on the Sites and then click on Add Website….
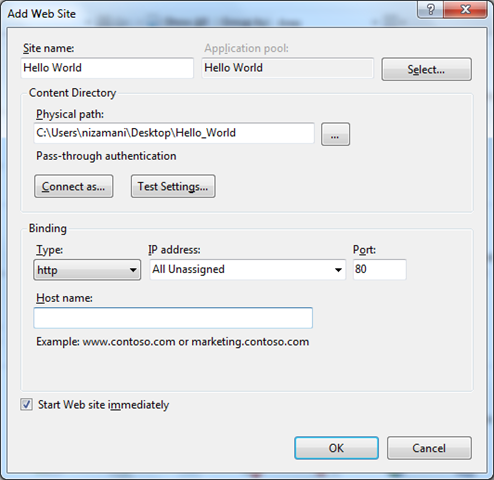
Step 6: Now give your website a name and enter the path where you published it.
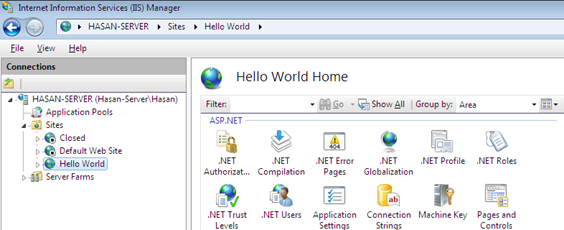
Step 7: If successful the website would appear in the tree on left side-bar as shown below
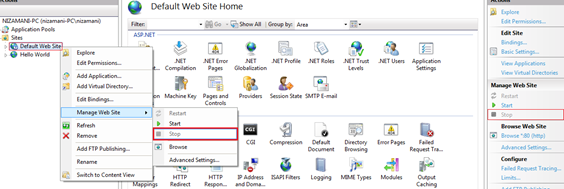
Step 8: Now make sure to stop the Default Web Site or any other website which is on the same port, here our ’Hello World’ web app is at port 80.
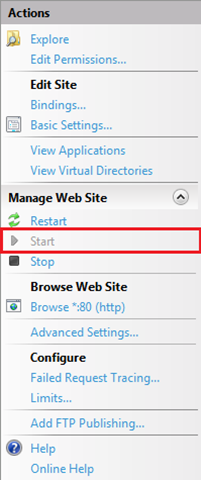
There are two ways of doing it, either right-click on Default Web Site and via Manage Web Site submenu click on Stop, or select Default Web Site and click on Stop in the right side-bar, as shows in the screenshot.
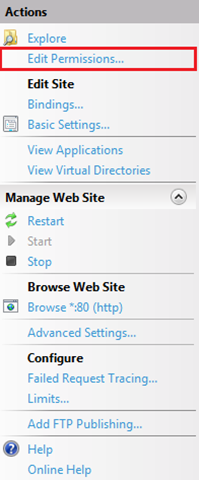
Step 9: Now click on Edit Permissions… as the access to your website would be prohibited on default. For that first make sure Hello World website is selected from the side-bar and then click on Edit Permissions on the right side-bar.
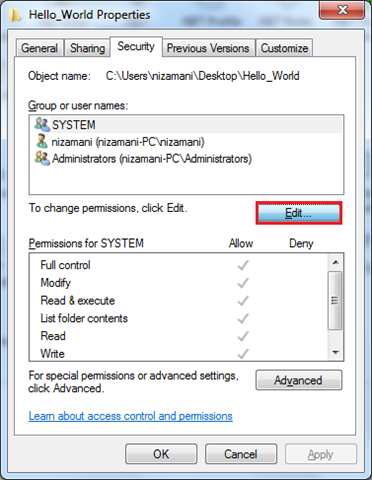
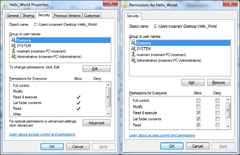
Step 10: Go to Security tab and click on Edit button
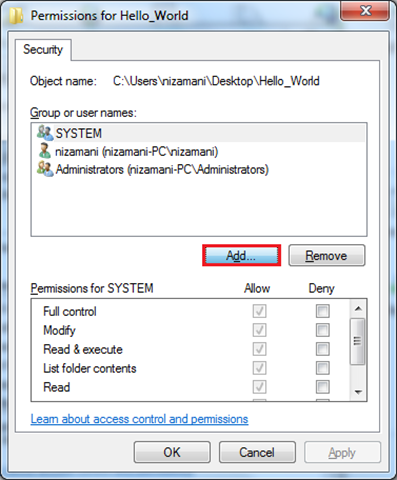
Step 11: Now click on Add to allow more users to access this website.
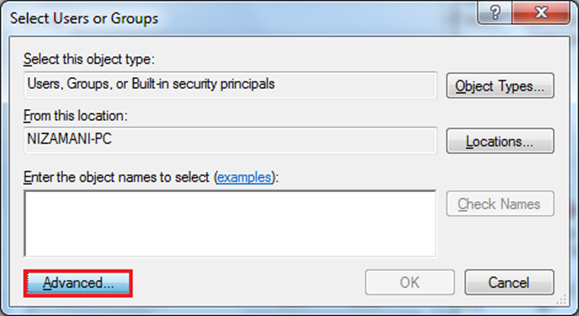
Step 12: Now Click on Advanced
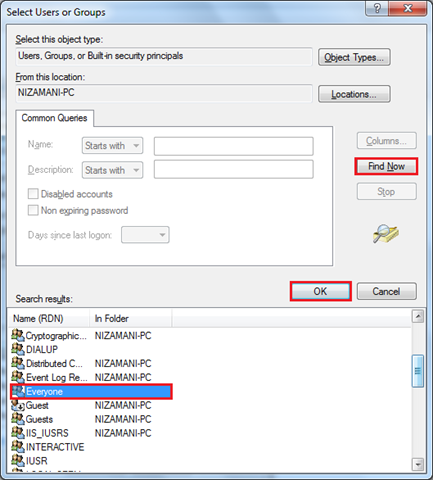
Step 13: Now click on Find Now button and search and select Everyone and press the OK button as here in this tutorial we’d be giving access to everyone who tries to access this webpage.
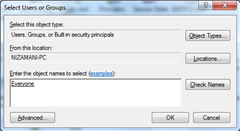
Step 14: There would be three more windows opening but here for simplicity just keep clicking OK button till only the IIS manager is open.
Step 15: Make sure Hello World website is selected on the left side-bar and click on Start in the right side bar as shown below.
(If successfully started then the Start button would be grayed and disabled)
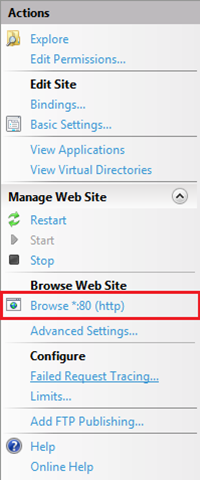
Step 16: Now click on Browse *.80 (http) button on the right side-bar.
If everything goes well you’d be seeing your website running. And now your website has been successfully hosted on your computer, and that your computer is working as a web server for your website.
To view it anytime on the computer where you have hosted it just logon to https://localhost/
To make this website accessible through the network following are the steps
If you access your website from another computer over the network you may an error, because your firewall is stopping them from accessing your website. For that you have to allow World Wide Web Services (HTTP) through the firewall.
Here I will show you how to do it if you are using windows firewall on windows 7 (on Vista it would be same).
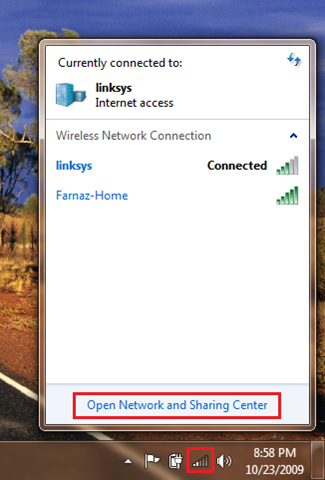
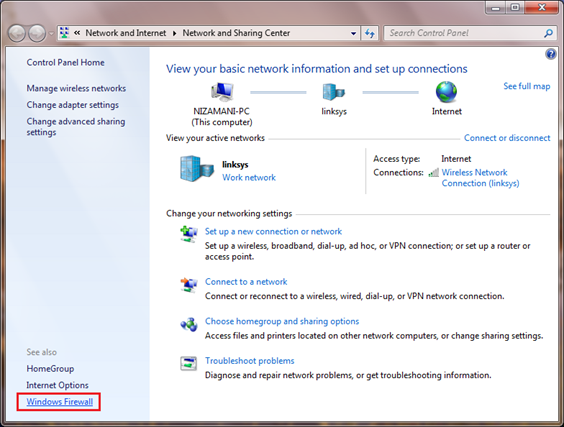
- Click on the network icon on the taskbar and click on Open Network and Sharing Center.
- Now in the left side-bar click on Windows Firewall.
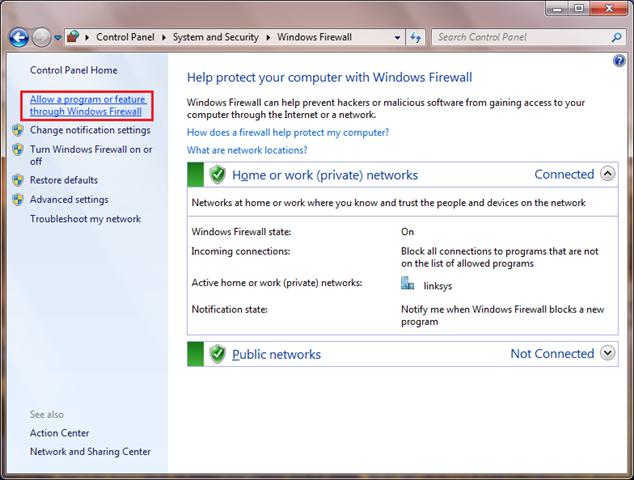
- Now click on Allow a program or feature through Windows Firewall link in the left side-bar.
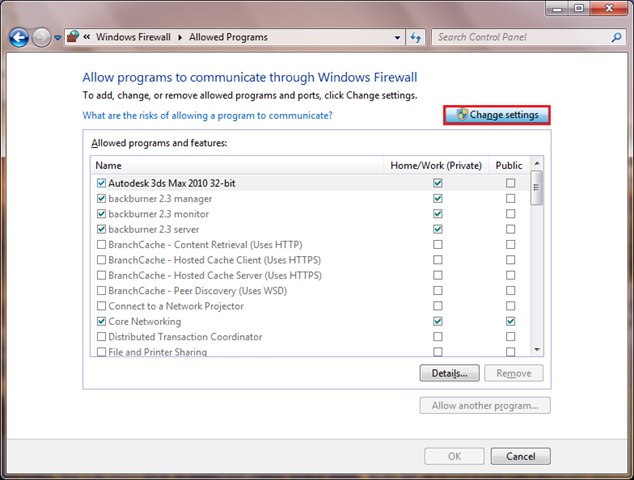
- Here click on Change Settings to be able to modify the settings.
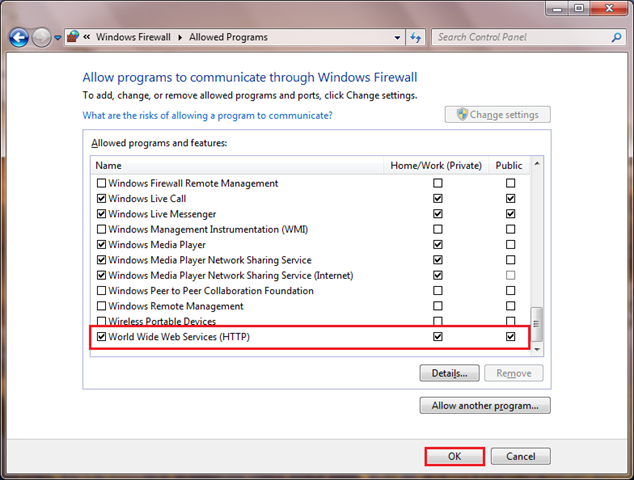
- At the end of the list there would be World Wide Web Services (HTTP), find it and enable the checks on both the columns as to allow anyone on the network to be able to access your website.
- Now press OK button and you’re done! Be sure to know your local IP address and type it in on another computer over the network.
Now if you have other computers on the network you can access this website through the IP address of the computer where you published your website and hosted it on IIS.


